How to make macros in Excel

Macros in Excel: The basics step by step
What is a macro in Excel?
A MACRO It is an action or series of actions that can be executed as many times as you want, since the instructions are saved within an Excel Workbook to be used whenever you need. With macros in Excel you can create and modify functions, forms, tables, complex applications, etc. It's like any Excel function but you can program it to do what you want.
What are macros for in Excel?
Purpose: A Macro allows you to automate repetitive Excel tasks. With a single click, all the tasks you leave scheduled are executed.
Advantages: You avoid errors, optimize your time and give you greater order to work.
How to enable macros in Excel?
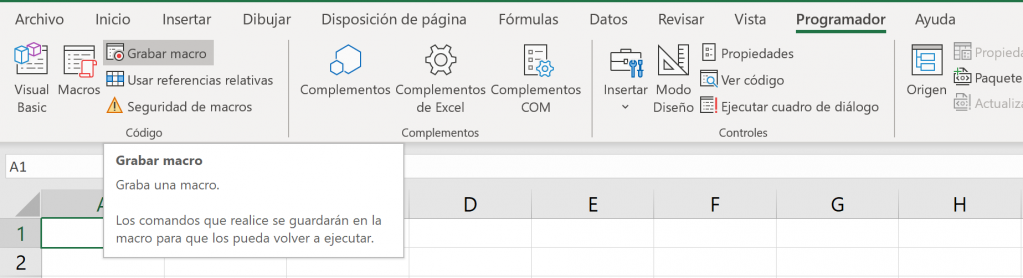
Before creating the macro, you must have the “Programmer” tab visible in Excel.
If you have Windows follow these steps:
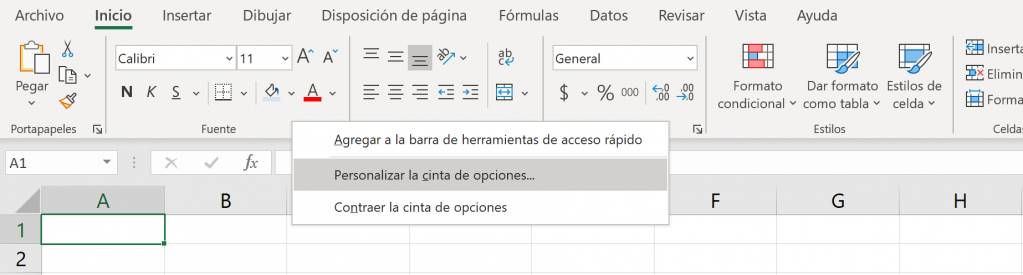
- Right-click anywhere on the ribbon and click “Customize the Ribbon.”
- When the options box opens, in the box on the right, click on the “Programmer” square.
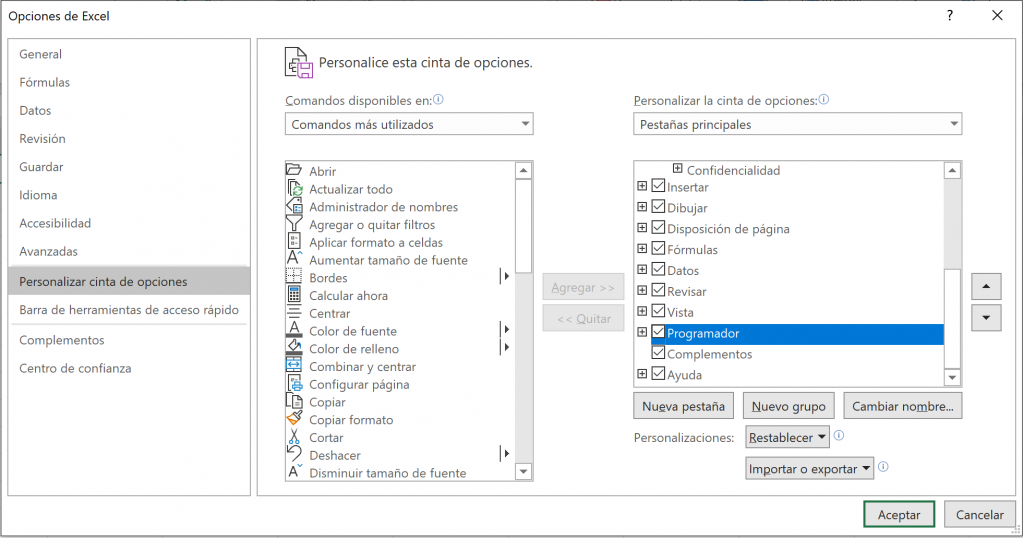
- Click “Accept”.
- You will find the “Developer” tab next to the “View” tab.
If you have a Mac, follow the following steps:
- Click on “Excel” (top left)
- Click on “Preferences”
- Select the “Toolbar and Ribbon” section
- When the options box opens, in the box on the right, click on the “Programmer” square
- Click “Save”.
- You will find the “Developer” tab next to the “View” tab.
How to make macros in Excel?
There are two ways to create a macro in Excel, it can be through:
- Macro recorder: This tool is ideal for those who do not know how to program but want to use macros. Under this mode, Excel records the clicks and keys you press to later follow the same instructions. This article will explain how to apply this.
- Visual Basic for Applications (VBA): es el lenguaje en que se programan las macros. Excel tiene un editor de VBA que permite la creación y modificación de Macros a través de este lenguaje. Si es que sabes algo de programación o sabes VBA esto puede ser preferible. Para profundizar en cómo crear macros con VBA puedes ver el artículo “Dominando del VBA”.
Ninja Tip: una práctica común y muy útil es complementar ambos: hacer una grabación para crear rápido una primera versión de la macro y luego hacer algunos cambios a través de VBA teniendo así más opciones y flexibilidad.
Ninja Tip: When you want to save an Excel Workbook with macros, it must be saved as .xlsm, an Excel file that supports macros.
In the following video you can see an example of a macro and better understand what they are:
Recording macros
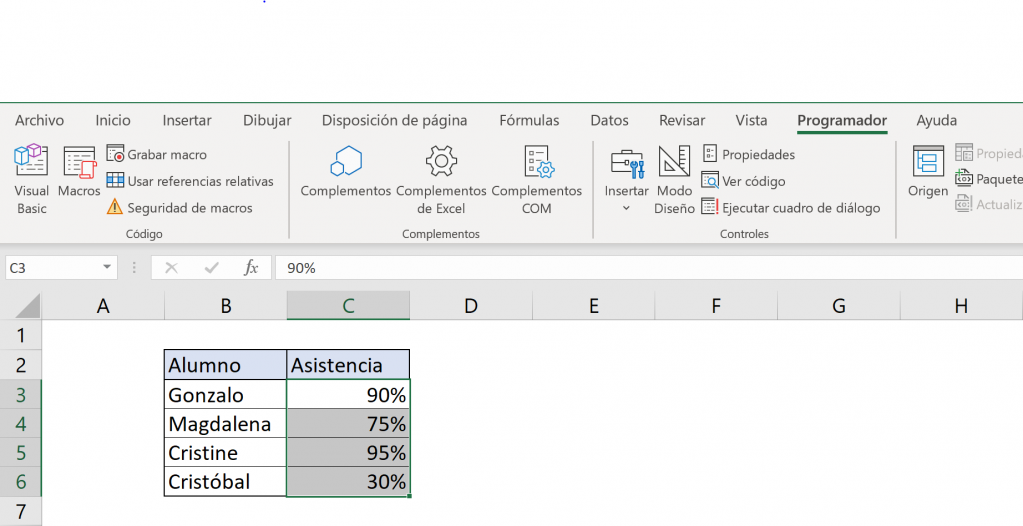
To start, let's create a macro that changes the cell format to percentage.
Ninja Tip: Los nombres de las macros deben empezar con una letra, no se aceptan espacios ni símbolos en los nombres.
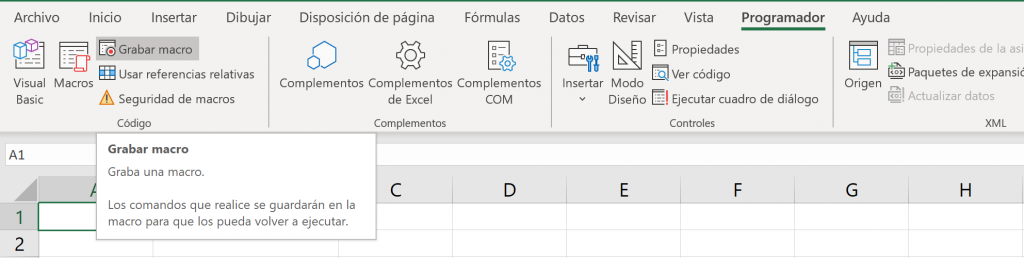
- Select “Record Macro” within the “Scheduler” tab.
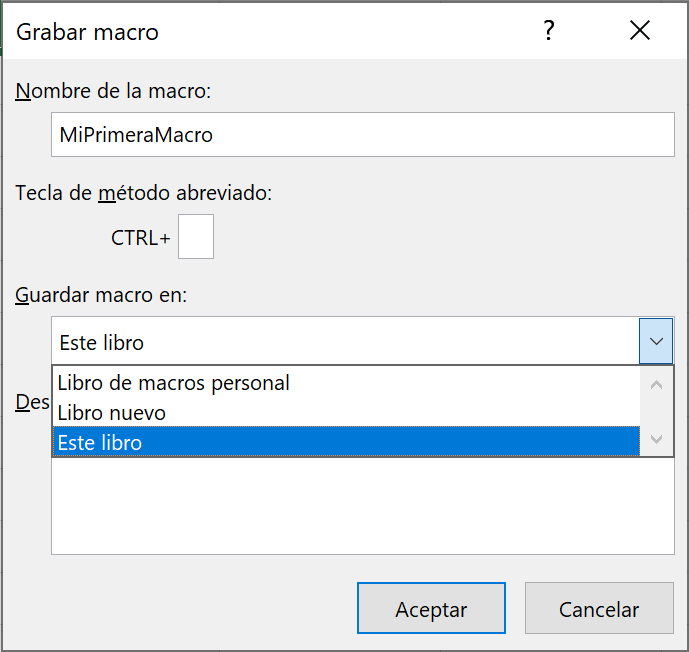
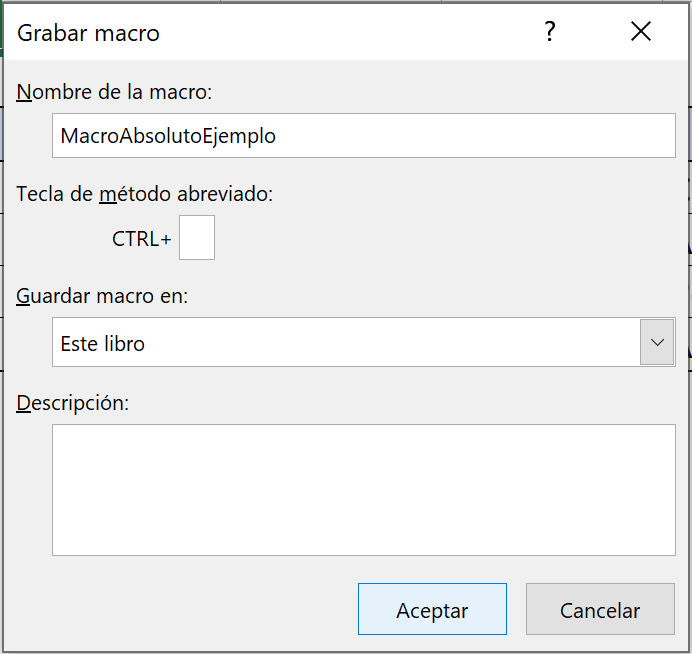
- Para guardar tu macro, primero debes nombrarla. Elige un nombre corto que describa bien lo que hace y que sea fácil de identificar para cuando se tengan muchas macros.
Ninja Tip: Los nombres de las macros deben empezar con una letra, no se aceptan espacios ni símbolos en los nombres.
- Elige dónde guardar la macro. Por lo general, se guarda en el mismo libro de Excel.
Ninja Tip: If you save the macro in this Workbook and want to use this macro in another workbook, you only need to open this workbook to access the macro. If you save it in “Personal Macro Workbook” the macro will be available in all your Excel workbooks.
- Optionally, you can create a keyboard shortcut. A shortcut is a combination of keys assigned to run the macro.
Ninja Tip: Even though it is useful for an action that is done very often, you must be careful that it is not repeated with existing shortcuts. You can make shortcuts with Ctrl+Shift+letter to avoid this type of problem.
- Optionally, you can add a description. It is useful when there is more than one person who will work with these macros.
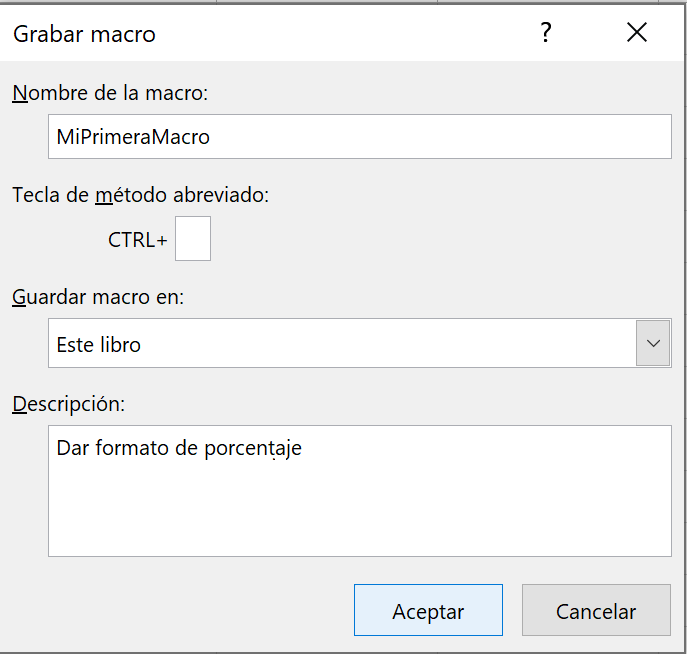
- Click on ”Accept”.
- Luego, debes hacer las acciones que quieres repetir. En este caso, haz click en Inicio y luego en el formato de porcentaje. No selecciones otra celda ni vuelvas a seleccionar A1 porque cambia la configuración de la macro, en el artículo de “Dominando VBA” se profundiza sobre ese tema.

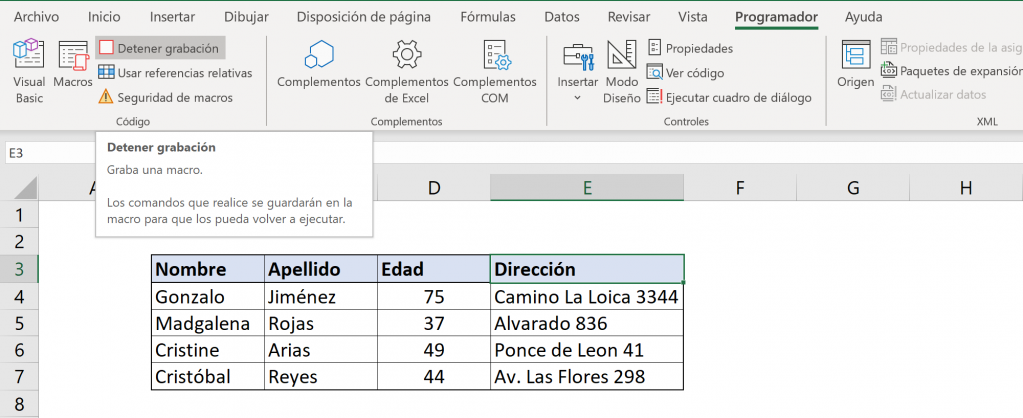
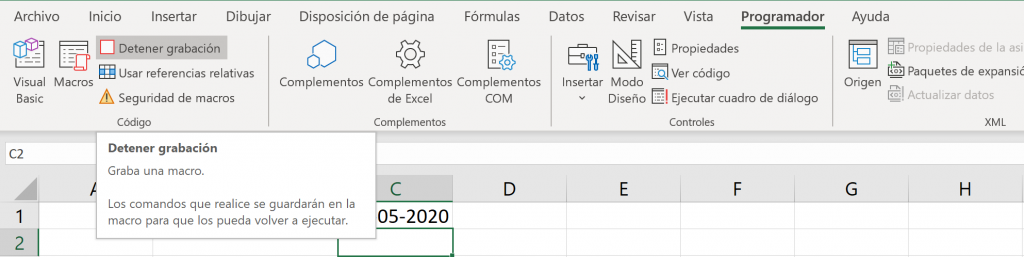
- Select “Stop Recording.”
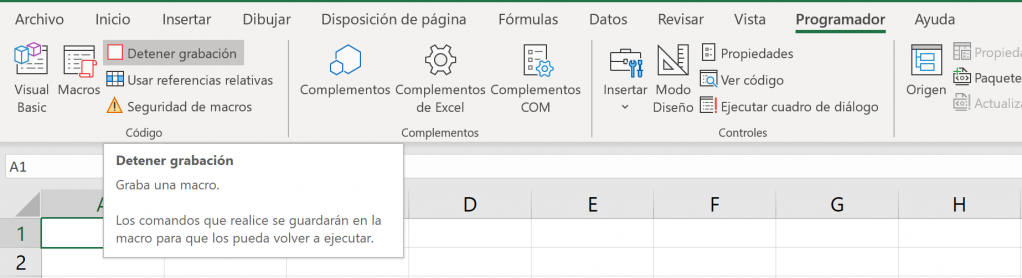
- Ready! You've already made your first macro!
You can see another example of how to create a macro in the following video:
Then, to implement the Macro:
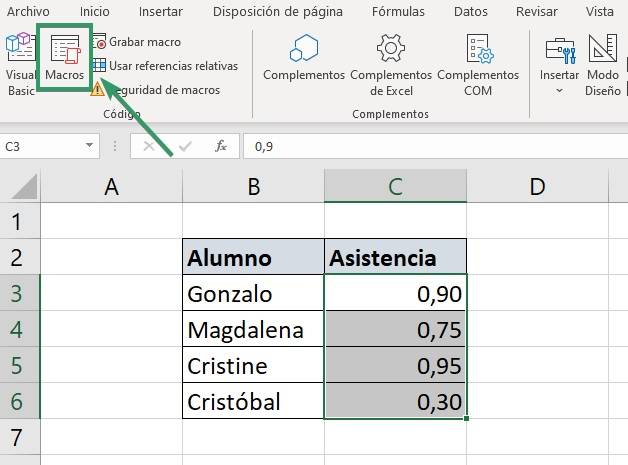
- Selecciona las celdas a las que quieres aplicar la macro y haz click en “Macros” en la pestaña de “Programador”.
Ninja Tip: You can use Alt+F8 instead of clicking on “Macros”
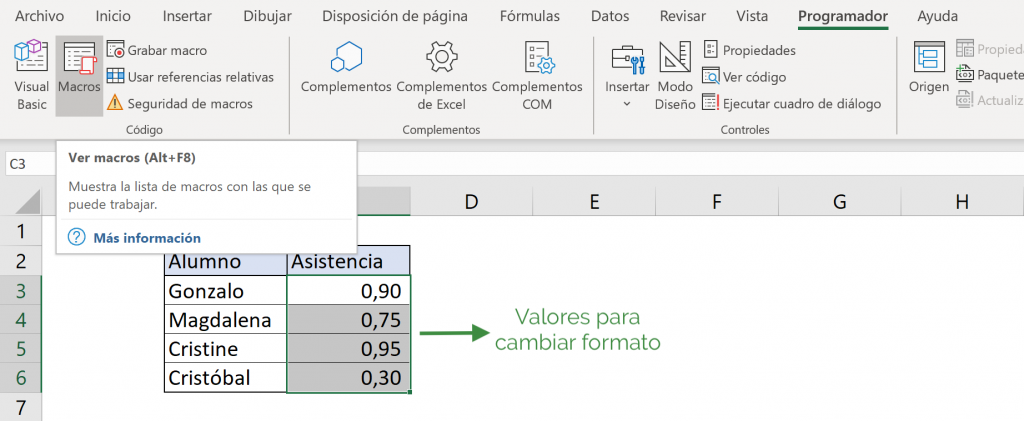
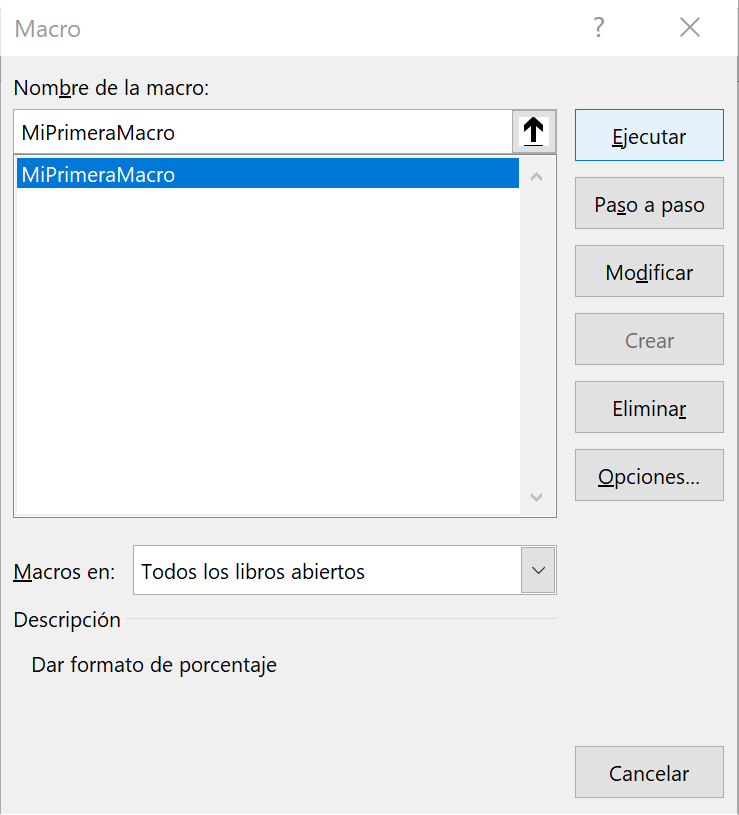
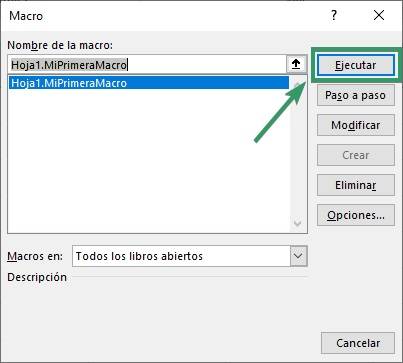
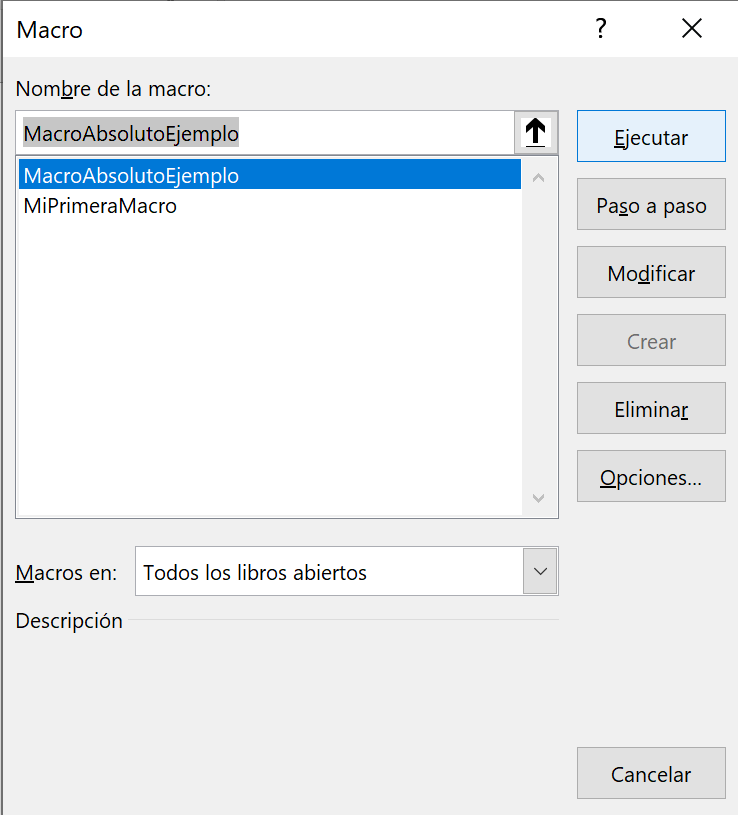
- Select the macro you want to run and click “Run”.
- That's all! The results are already seen.
You can also create a button that when clicked on it executes a macro. You can watch the following video to learn how to do it:
Program macros in Excel with Visual Basic Editor
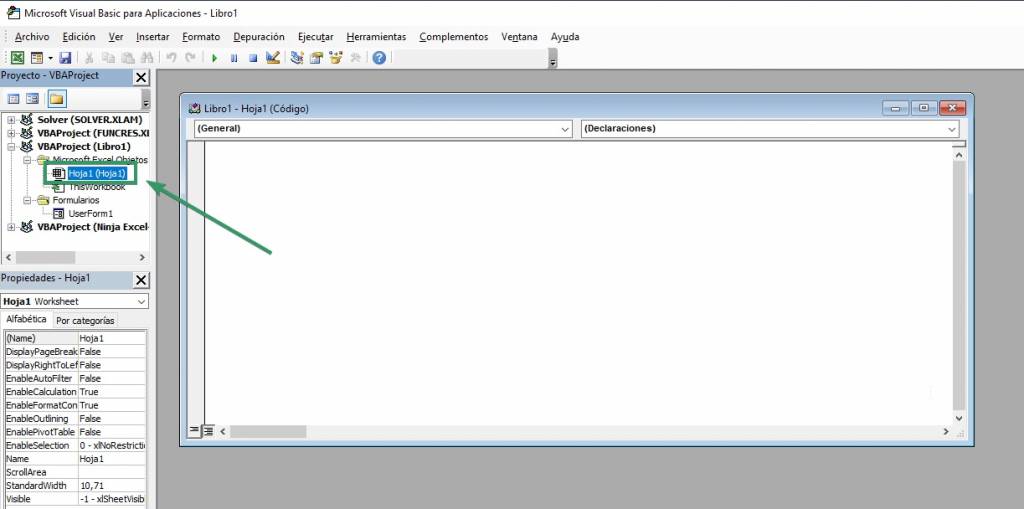
- Select Visual Basic on the Developer tab.

- Se abrirá el Editor de Visual Basic y debemos crear nuestra primera macro. Primero debemos abrir nuestra hoja en la que trabajaremos, para esto, haz click en la hoja que deseas la macro.
- Now we will begin by creating the macro, for this we will indicate the subroutine with the word “Sub” and then the name of the macro, in our case, MyFirstMacro.
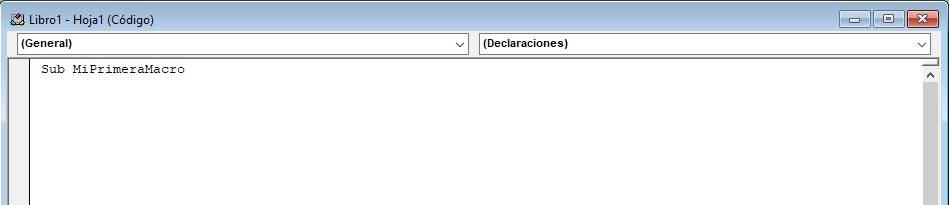
- We click on Enter so that the parentheses at the end of the name and End Sub appear automatically, which indicates the end of the subroutine, that is, the end of the macro.

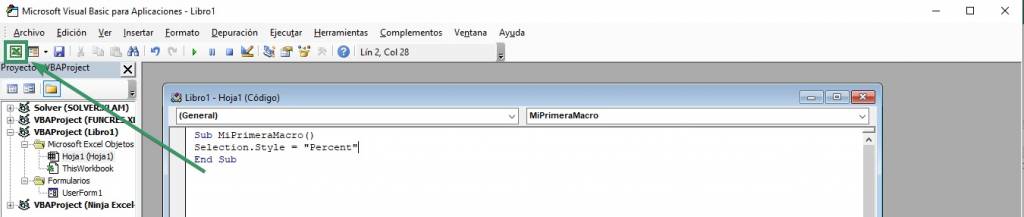
- Ahora entre Sub y End Sub debemos escribir el código de la macro. Como buscamos insertar un porcentaje a las celdas, debemos escribir el código Selection.Style = “Percent”

- We return to Excel by clicking on the Excel icon and that's it! We have already programmed our first macro.
- Now, we must run our macro for student attendance, we select the attendance cells and click on Macros.
- A dialog box of our macros will open, we select the macro that we want to execute, in our case MyFirstMacro and we click on execute.
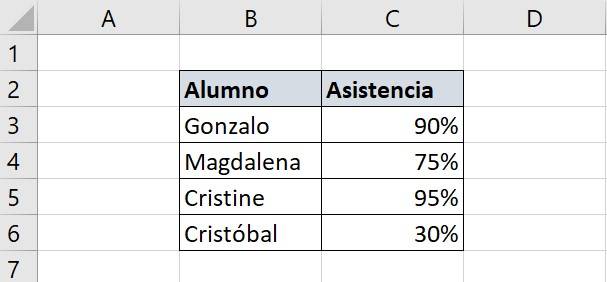
- Ready! Now we can see that the assists are in percentage format.
Using relative references in macros
There are two types of references in macros:
- Absolute reference: The cells you select when recording the macro will remain fixed. That is, each time you run the macro the same cells will always be filled, regardless of which cell you have selected when you run the macro. The macro is recorded in absolute mode by default.
- Relative reference- The macro will be executed on the cells depending on which cell was selected when the macro was executed.
Ninja Tip: It is better to use relative references to have greater flexibility in macro execution.
For example, every week you export an Excel table to which you must periodically apply names to the columns. To do this, you record an Excel macro that allows you to fill in the names of these columns. Let's see what happens if I do an absolute macro versus a relative macro.
Record macros in absolute mode
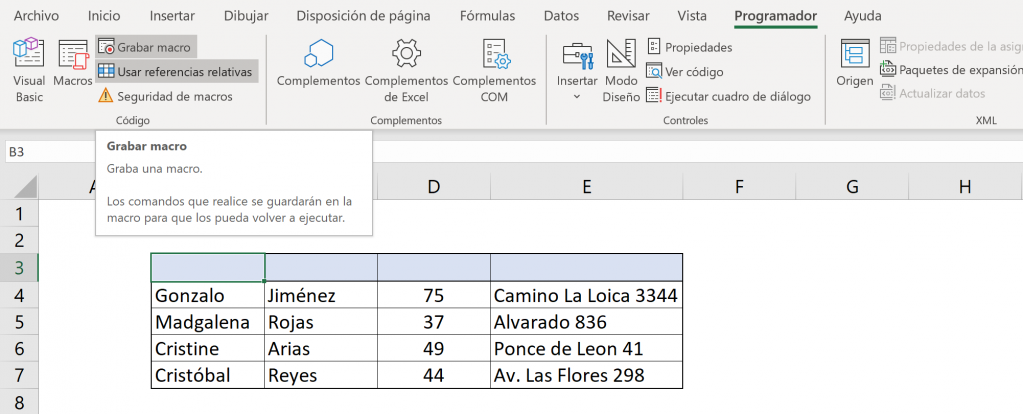
- Click on “Record macro”, name it and save it in the corresponding Book. We will call it “MacroAbsoluteExample”.
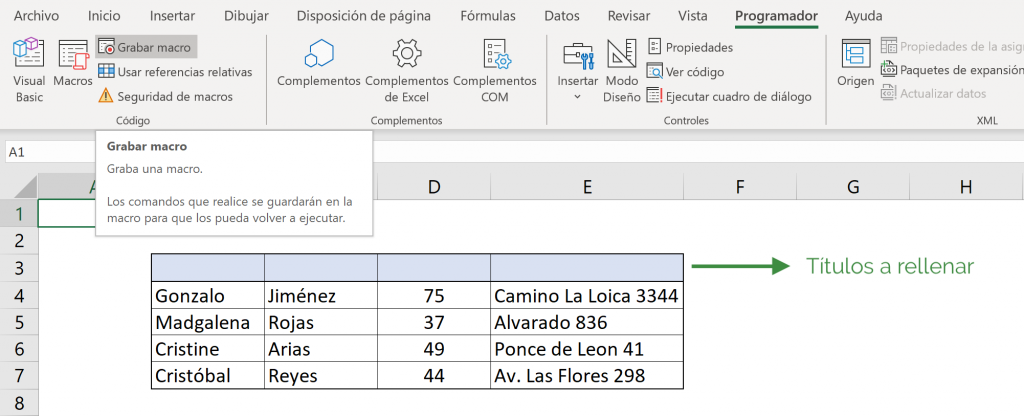
- Then, click on B3 and fill in the column names accordingly and click on “Stop Recording”.
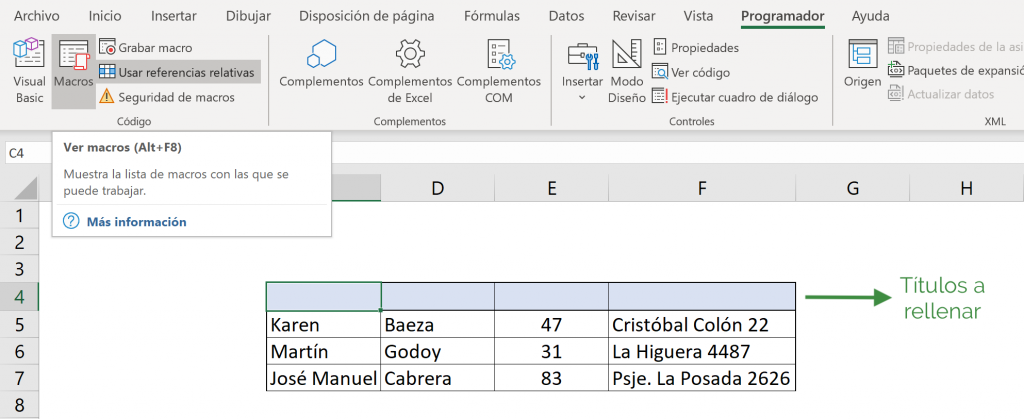
- Now, when you are faced with another table of the same type, go to another Book or tab and click on “Macros”.
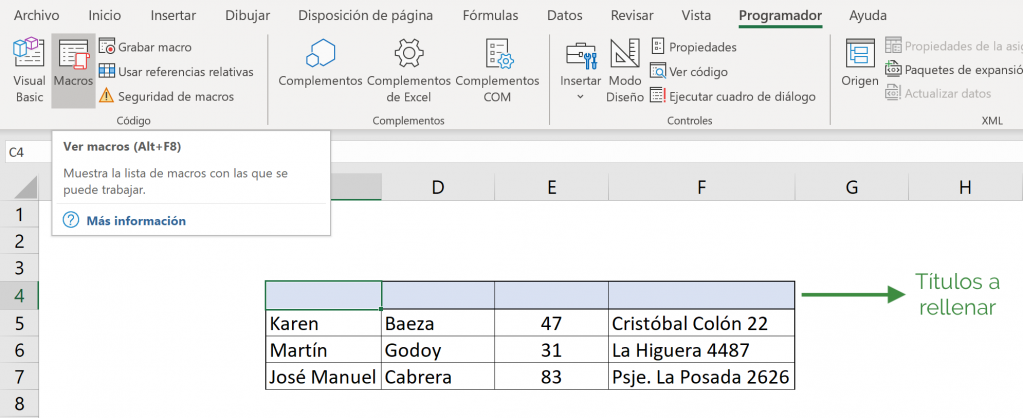
- Choose the macro you created and click “Run”.
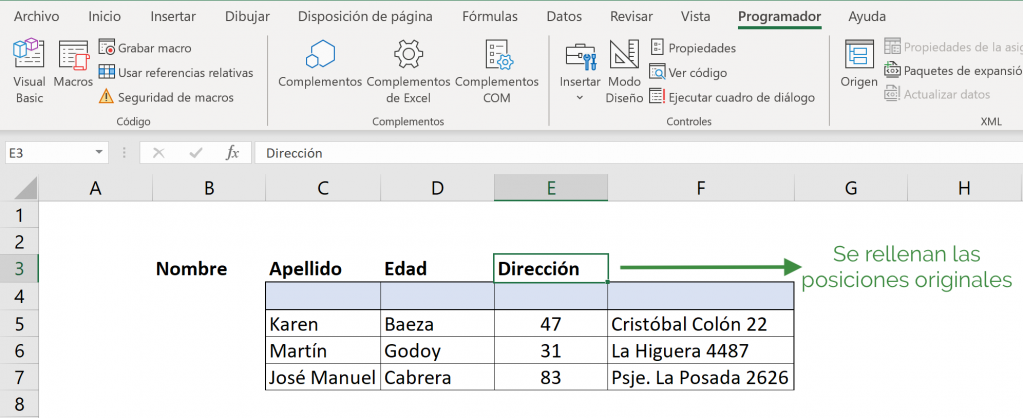
- Notice that it is written In the same place than when we created the macro. That means that it is “absolute”: the rules are followed to the letter and the instruction in this case is that in B3 you write “First name”, in C3 you write “Surname”, etc. without considering which cell I have selected when executing the macro. In this case the macro did not meet the objective because the table started in C5 and not in B3.
Record macros in relative mode
- Click “Use relative references”.
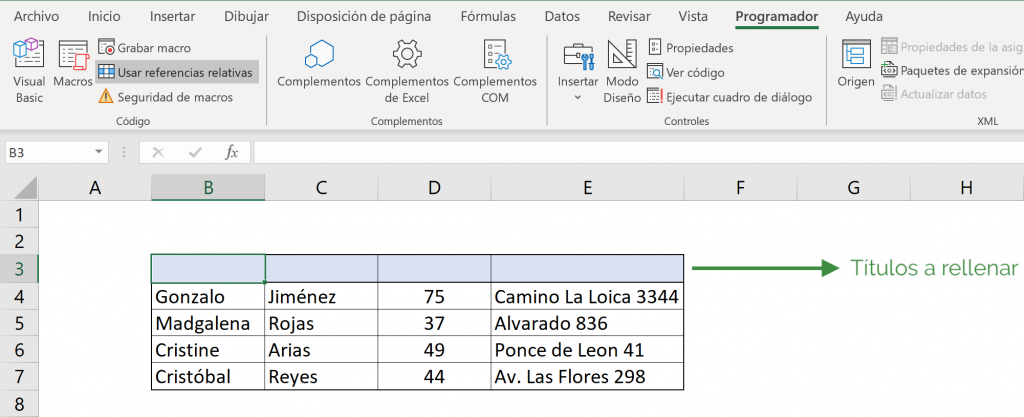
- You must select the cell you want to fill (B3), click on “Record macro”. Name it and save it. We will call it “MacroRelativeExample”.
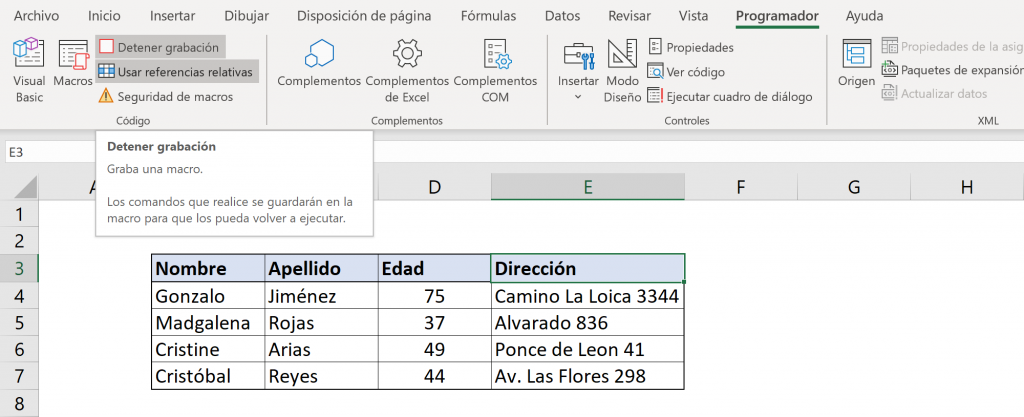
- Then, fill in the column names accordingly and click “Stop Recording.”
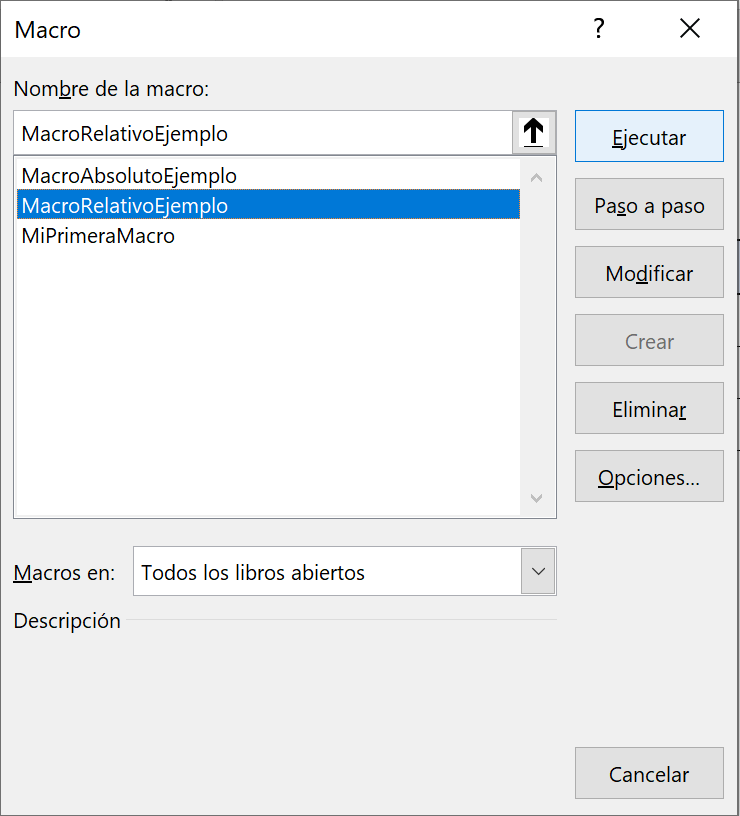
- Now, when you are faced with another table of the same type, go to another Book or tab and click on “Macros”.
- Choose the macro you created and click “Run”.
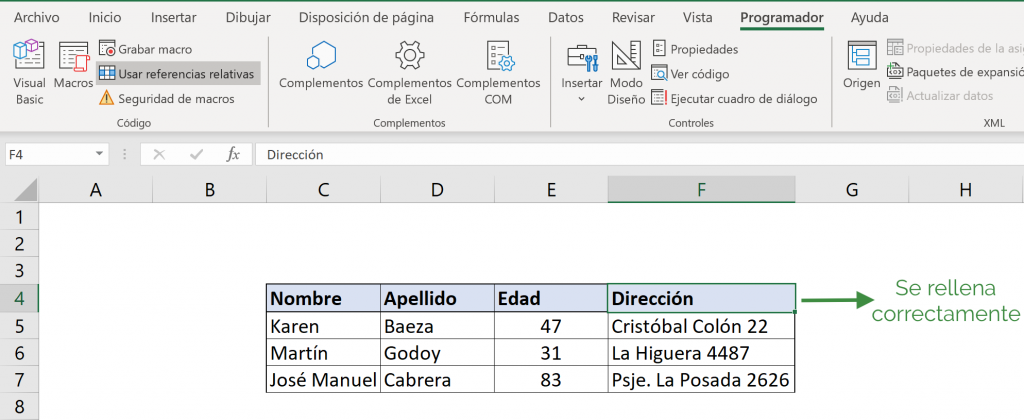
- Now it is seen that the instruction It was executed taking into account which cell you had selected when starting the macro. When creating the macro, it was started in B3 and written in B3, C3, D3 and E3. So, now when I selected C4 and ran the macro, it was written to C4, D4, E4 and F4. Thus the macro records that you have to write “First name” in the cell that was selected at the beginning and then write “Last name” in the cell that corresponds to the right.
Common error in relative mode in macros
A common mistake when using macros in Excel is dragging formulas to fill a table and believing that relative mode will fill the entire table. For example, you created a macro that creates a new column with a formula. A common mistake is to drag to the end of the table and believe that the macro will work for a table with a different number of rows.
In this example, we use relative references to populate record the macro and populate the table.
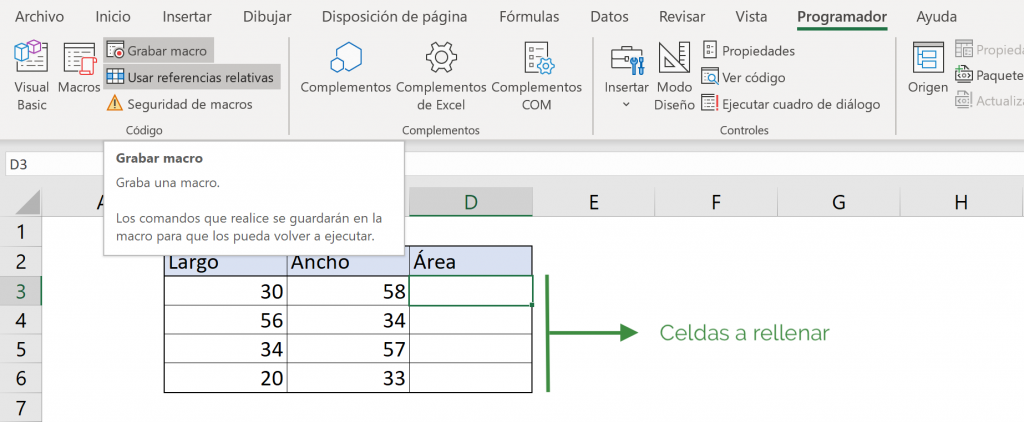
The formula was then put into D3 and dragged to fill the table.
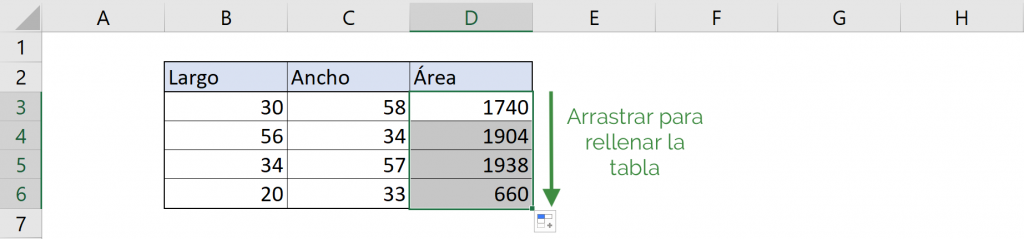
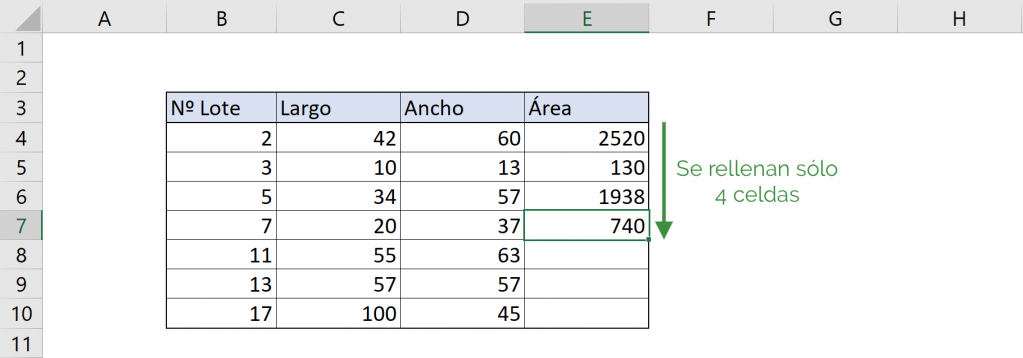
However, let's see what happens when we run our macro when faced with a different table: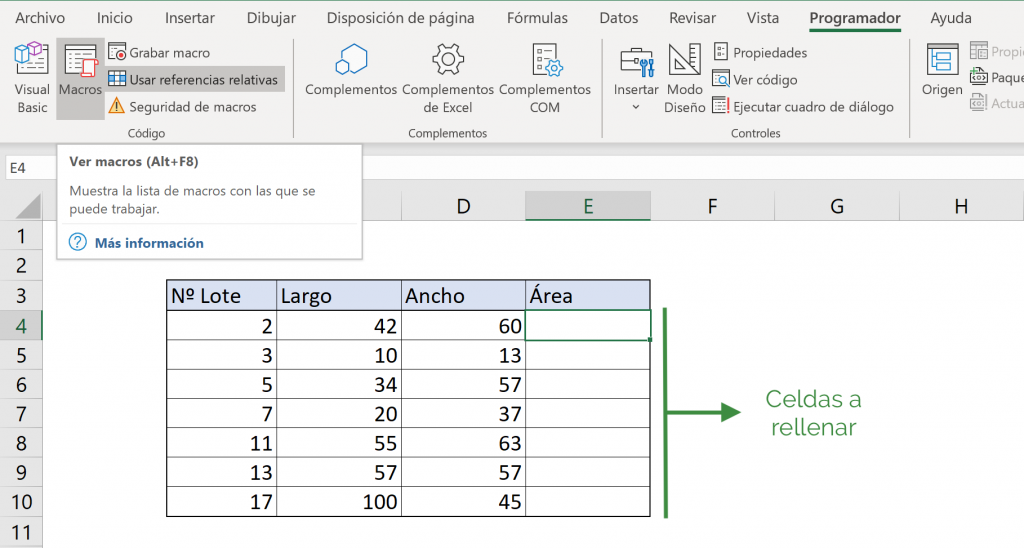
We see that when applying the macro, not all the cells in the table are filled, but only from E4 to E7. This happens because the recording understood the instruction “fill in the three cells below.” To solve this problem you can see the article “Mastering VBA”.
Add a macro to the toolbar
Adding a macro to the top toolbar is very useful when there are actions that you must perform very often.
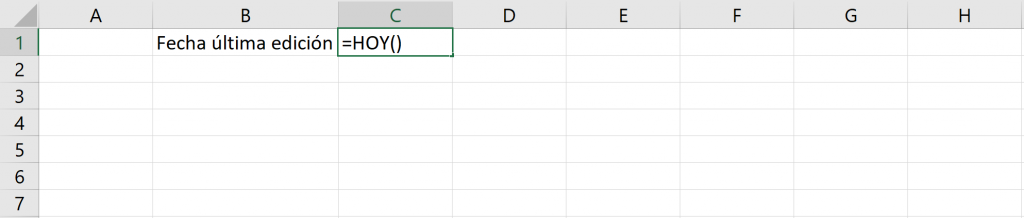
- Create a macro, in this case, we will create one that writes the current date in cell A1. To do this, click on “Record macro”.
- Name and choose which workbook you are going to save the macro in.
Ninja Tip: Independiente del lugar que elijas para guardar la macro, el ícono podrá instalarse y aparecerá en todos los Libros que abras de Excel. Si lo guardas en el Libro1 y quieres ejecutarla en el Libro2, tendrás que abrir el Libro1. Si quieres evitar abrir el Libro1 para usar esta macro, puedes guardar en “Libro de macros personal”.
- In cell A1 write “=TODAY()” and click “Stop recording”.
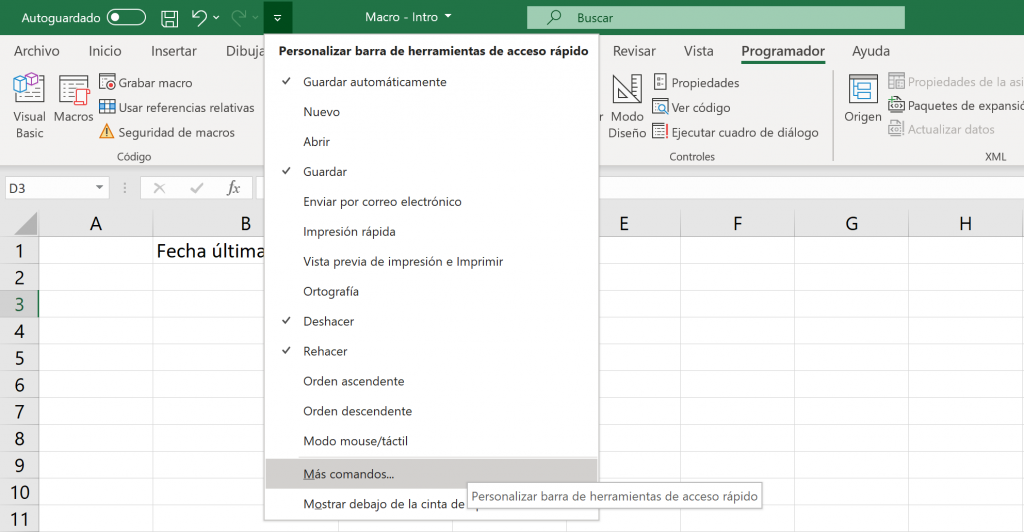
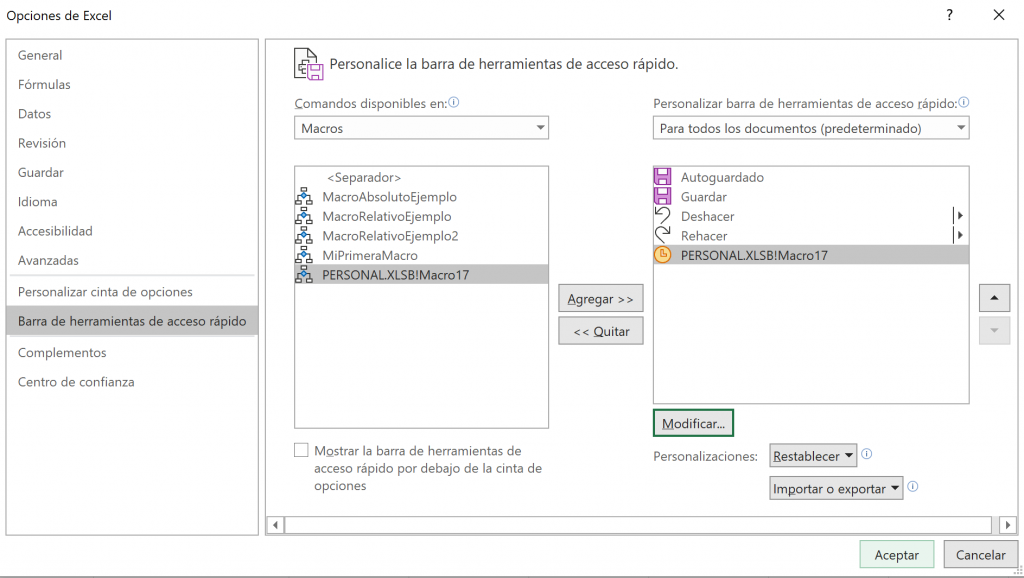
- Una vez finalizada la creación de la macro, haz click en la barra superior verde la flecha hacia abajo y se abre un menú. En ese menú selecciona “Más Comandos”.
- In the “Commands available in:” section, select “Macros”
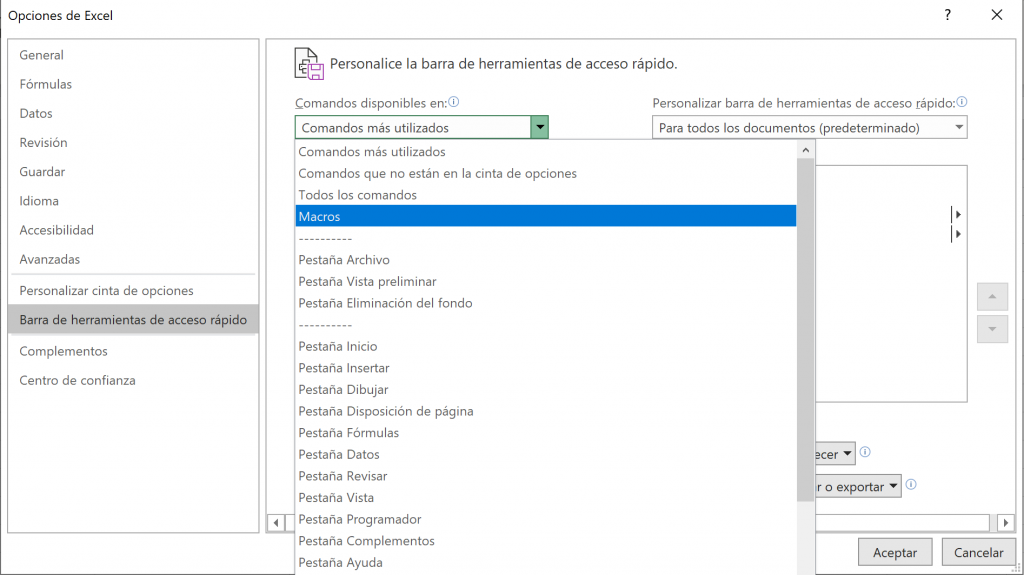
- Select the macro you want in the toolbar. In this case MacroHoy. Click on “Add”.

- You can press “Modify” to choose the icon for that macro. And click on “Accept”.
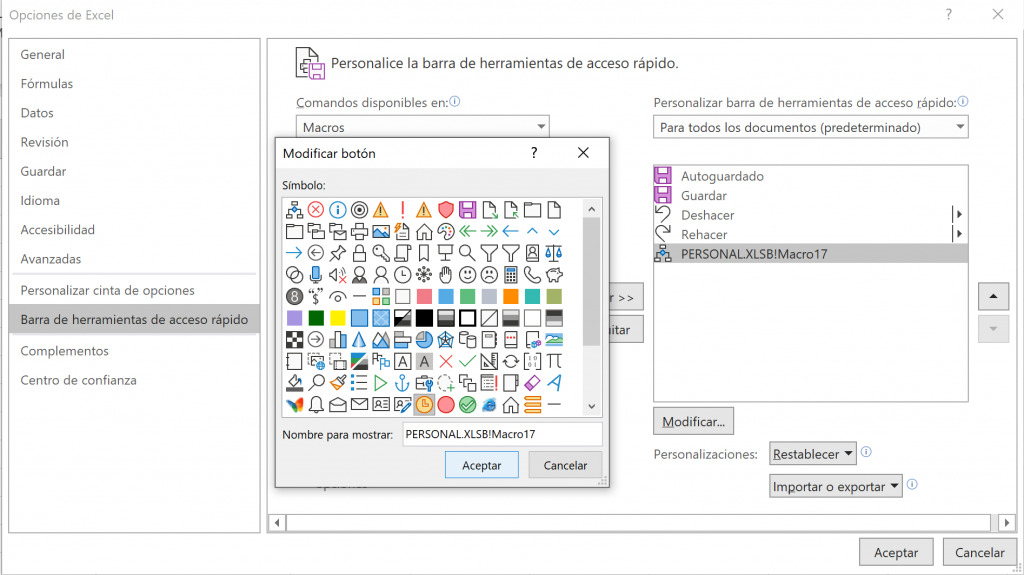
- Then, click “OK” again.
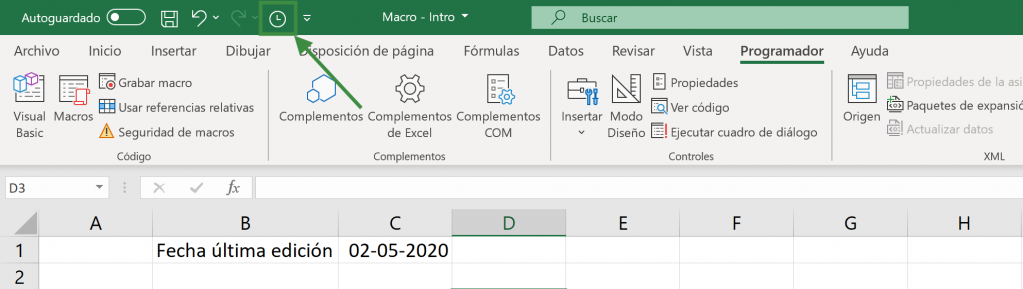
- Now you can see the macro icon on the top toolbar. By pressing the icon, the macro is executed.
Examples of macros in Excel
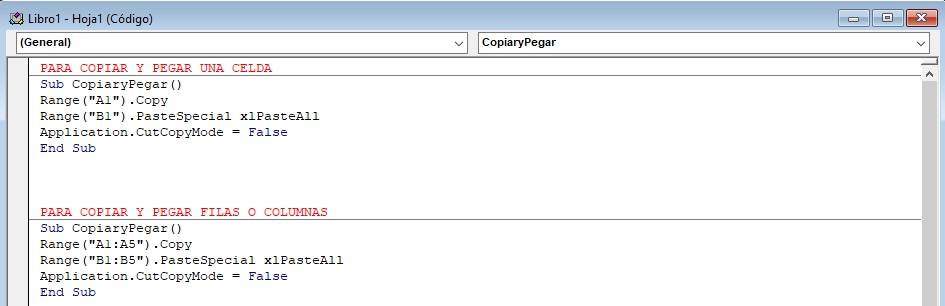
Macro to copy selected content
To copy cells in the same sheet in Excel write the following code:
Macro to print a sheet
To print the current Excel sheet, type the following code:

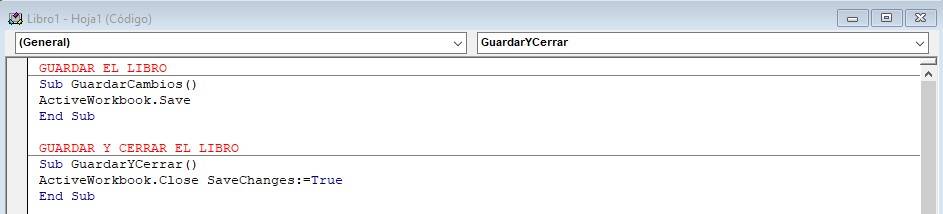
Macro to save file
To save a file, write the following code
Macro to format a range of cells
To change the format of a range of cells, apply the following code and adjust it your way.
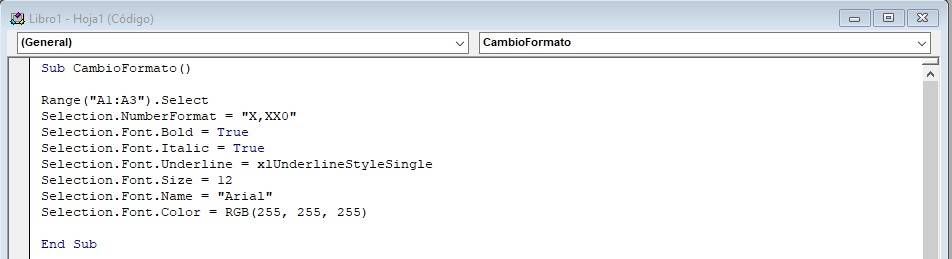
The range of cells must first be selected with the Range().Select code and then you can edit it in your own way.
Macro to search data in excel vba
To search a value in a database, write the following code. The macro will tell us the cell that first matches the searched value.
 First we must indicate the range of cells in which we want to search and then determine the cell in which the searched value is found.
Conclusions
An Excel macro is an action or a set of actions that can be executed as many times as desired. It is a very useful tool as it allows you to automate repetitive tasks. It also reduces errors and work time.
Frequent questions
How to create a form in Excel with macros?
To create a form in Excel follow the following steps:
- On the Developer tab, select Visual Basic.
- In the Visual Basic Editor select the Insert tab and then click UserForm.
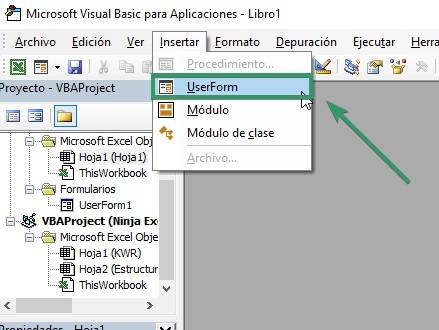
- Listo! Ahora puedes ver el formulario en blanco en el ual puedes agregar los elementos que quieras.
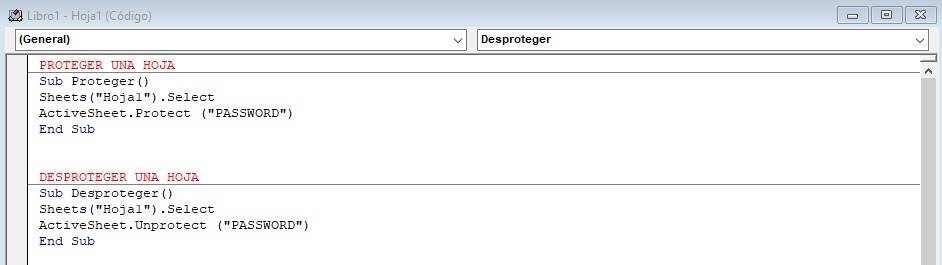
How to protect a sheet with macros?
To protect an Excel sheet using macros, write the following code in the Visual Basic Editor. Then you must run the macro to be able to protect or unprotect it.
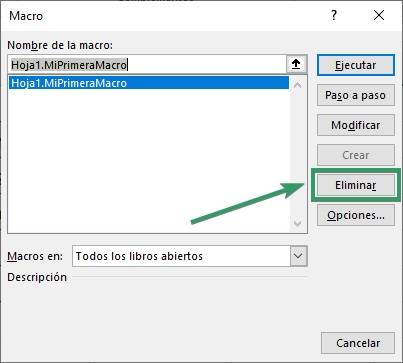
How to delete macros in Excel?
Within the Developer tab, click on Macros. In the dialog box, select the macro you want to delete and click the Delete button and that's it!
Frequent questions
First you must have the “programmer” tab enabled, which by default is hidden in Excel, then you can record your macros
A Macro is a set of saved actions that allows us to execute them when we need them, in this way actions that are usually done manually repeatedly can be executed without having to do them manually
Macros are automated actions that can be repeated as many times as necessary, clicks and keystrokes are recorded and then repeated.
